- We're here to help!
- +780-940-6767
- michael@nordalta.com

The Millwoods Accessible Bathroom Project
The Castlebrook Kitchen Tranformation
August 16, 2025Who should I notify before I start a renovation project?
November 17, 2025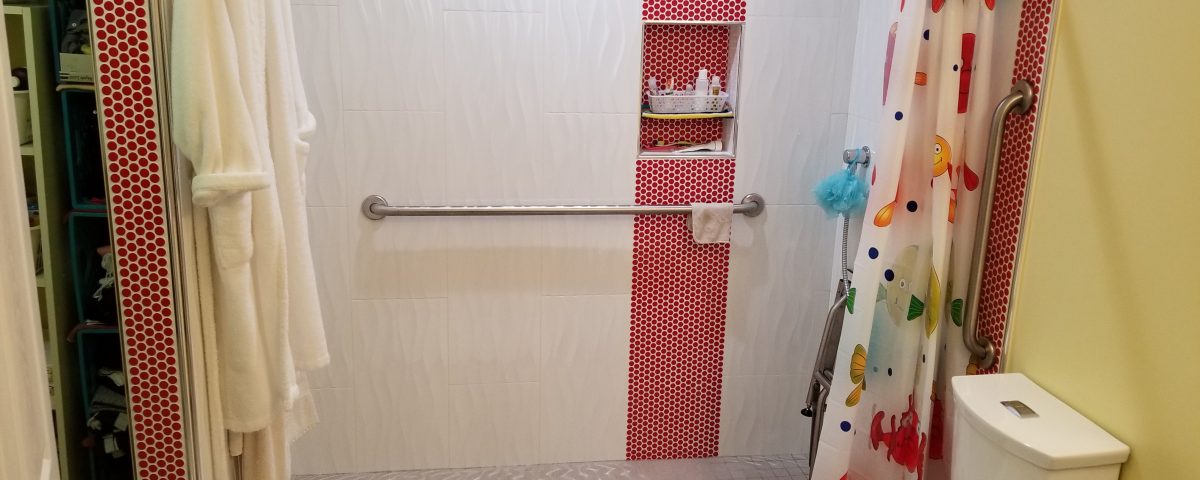
Although we are experts at accessible renovations (and lots of other renovations too!), there is always something new to learn or something new perspective that we can add to our repertoire of making your living arrangements easier to use, more functional, and more beautiful. This nice accessible bathroom project in Millwoods illustrates this point. In addition to making the bathroom more accessible for someone with mobility issues, we also added in an element of accessibility that we’ve never focused on quite so much in our past projects…the concept of accessibility for people with vision impairment.
Bright Whites and Beautiful Reds
The most striking feature of this bathroom is the use of contrasting colors to help show the location of things in the bathroom. Our client chose a red ‘pennyround’ mosaic tile, along with a textured white wall tile, and linen colored floor tile. Using these very different tiles in strategic locations will help the client know where changes in the bathroom occur…a nice feature if someone has a hard time seeing well. If one were to incorporate this element into their own project, they could go with bright, bold contrasting colors such as the one shown here, or they could choose a subtler set of colors.
The Shower Area is the Focal Point
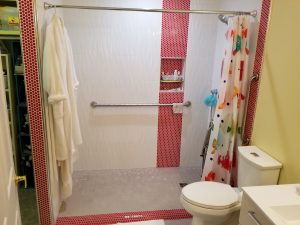 The house where this renovation took place is a bungalow, already a great style of home to incorporate accessible renovations. This bathroom, particular, is technically the ensuite bathroom. We moved the wall between the bathroom and the walk in closet over to make the bathroom a little larger and the closet a little smaller. The main reasons for the wall shift were to have room for a 36″ door to the bathroom (which is very nice for someone in a walker or, eventually, a wheelchair), and to allow for a 6′ wide shower. The shower, being bigger, could mean that if someone needed assistance with bathing, there would be plenty of room for an assistant to help out. They might even not get soaking wet trying to help out in the shower. Where the floor changes slope, we used those red ‘pennyrounds’ that we discussed earlier. As well, a vertical stripe run right through where the shower niche is located, making it easy to know where the soap and bottles of shampoo and conditioner are. A couple vertical stripes along the sides finishes of the shower.
A Closer Look at the Shower Area
Inside the shower we put the largest fold down bench we could without having one custom made. The bench is 32″ wide and made out of phenolic resins. The legs are stainless steel and are bolted to the wall with stainless steel lag screws. In other words, this bench won’t rust or deteriorate from mold.
As well, we have a two grab bars and a combination towel/grab bar in the shower area. The shower head is mounted on a slide bar and can be adjusted fairly quickly, or taken off the bar completely and used as a hand shower. The towel bar/grab bar is, personally, one of my favorite accessible accessories. Not only does it support a lot of weight but it looks fantastic. I’ve talked to many people who said they have slipped when getting out of the shower or tub and grabbed on to a regular towel bar. If they avoided getting hurt, they still had to deal with a broken towel bar. this guy, however, will support over 300 pounds.
A Quick Look at the Vanity
Our client opted to go with a vanity that was wall mounted and had two pull out drawers. The top drawer has a round cutout built into it to allow for the plumbing to be put in. The vanity counter top came is cultured marble and came with the vanity as a combo unit. The taps are Moen Zarina single handle lever in chrome and there was enough leftover red pennyround to do a back splash. The toilet is a comfort height dual flush toilet by American Standard. Although the vanity doesn’t work well for someone in a wheelchair (the client doesn’t use one), the nice thing about it is that it can easily be swapped out for one that does.
Overall, this project went fairly smoothly, the only hiccup being a ceiling that went from popcorn texture to flat. There were some inconsistencies in the ceiling that required us to spend a bit of time getting it to look immaculate. Once that was taken care of, everything fell into place quickly.
This beautiful Millwoods accessible bathroom project was completed in August of 2017.