

Transforming 2 to 3-piece bathroom
January 27, 2026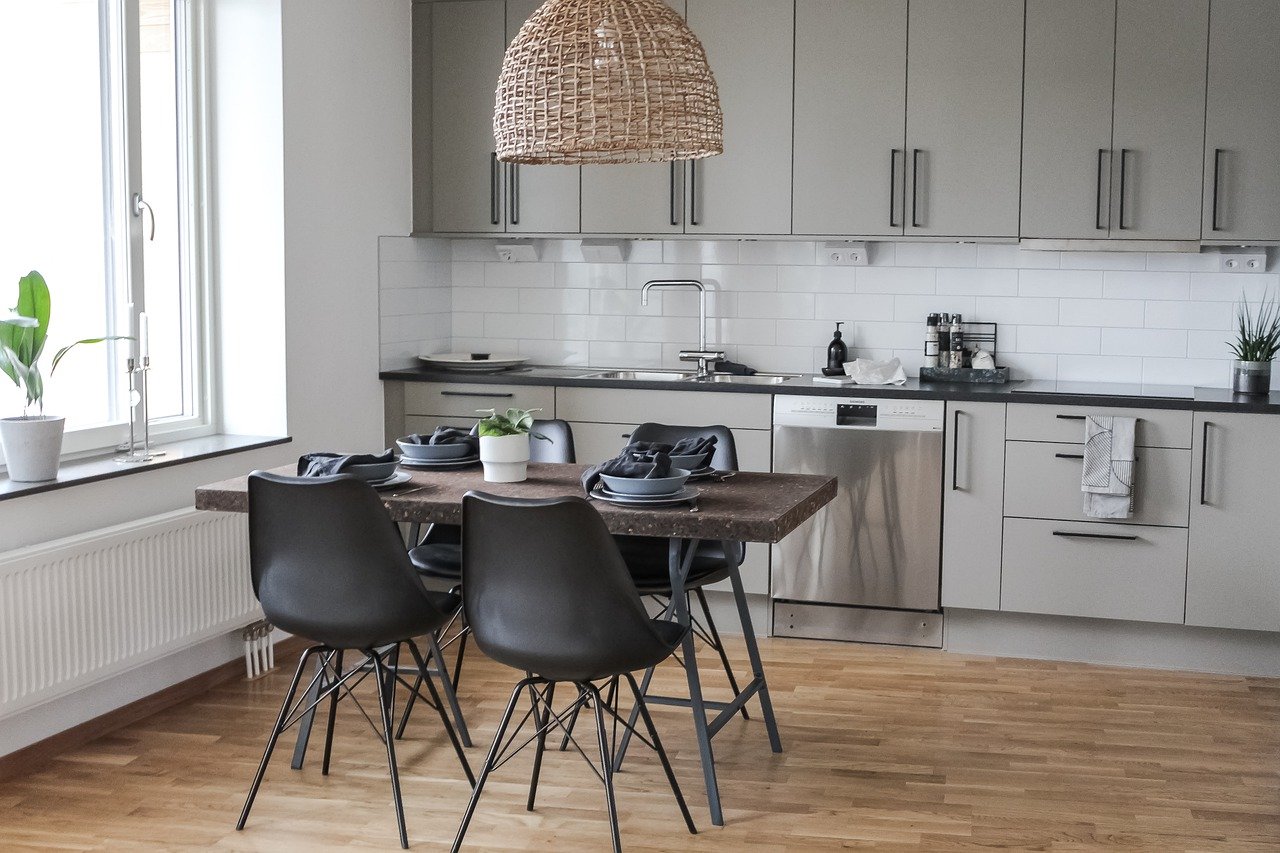
2021 Kitchen Trends: Kitchen Renovation Ideas for a Stylish and Functional Space
March 31, 2026Our first bathroom reno project started and completed in 2020 is, in my opinion, a work of art. Often, condo Bathroom Renovations can be difficult to make significant changes to the overall look and feel. This bathroom, however, was roomy and perfect for turning it into a virtual oasis.
This bathroom renovation adds color for a beautiful beach feel…
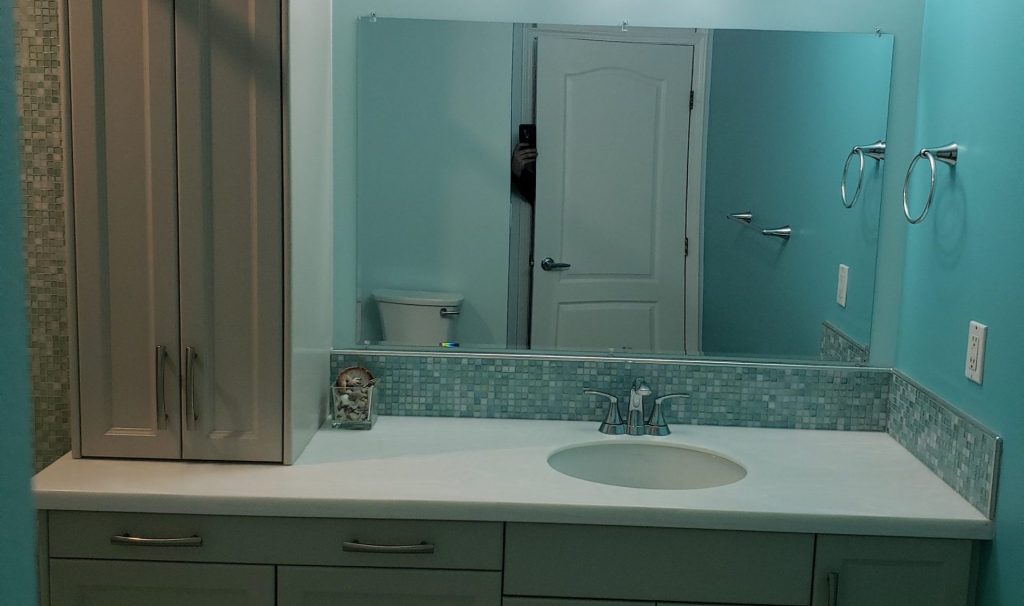
In contrast to the creamy tones in the vanity and floor tile, the walls were painted in the color Seaspray: a soft blue that mimicked the sky color on a clear day. One bathroom wall was given a feature color, Tropical Splash, a bold blue that suggested if one looked around, they would be seeing a sandy beach with shells. Combined with a bright white ceiling, the color combination didn’t overly darken the bathroom and give it a cramped feel. Instead, the colors complimented the space well and didn’t overpower the fixtures.
The bathroom vanity cabinets color is called Shaker, an off-white color that suggests white, sandy beaches. The countertop is White Onyx in Corian and has a Kohler under-mount sink and a set of Chrome Moen taps. The backsplash tile is the same tile featured in the shower: an Aquamarine glass mosaic tile. The backsplash was trimmed out, of course, with a Chrome Schluter trim to match the other chrome fixtures in the bathroom.
A shower remodel that says “ah, relaxing” just by looking at it…
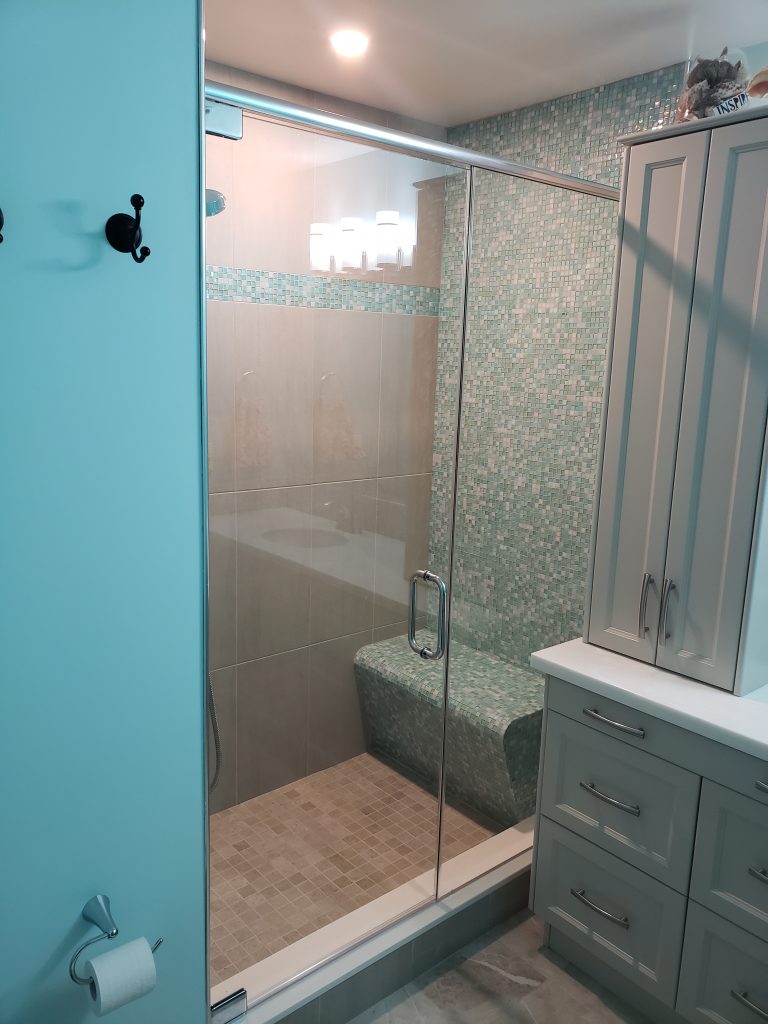
When we first started planning this bathroom with our client, we wanted to do something that gave the bathroom a very personal feel…the idea that there was no other bathroom like it. We knew we were removing the old bathtub with the acrylic surround and putting in a walk-in shower. We suggested to my client that we should put in a bench that is made from the same waterproofing material that the shower walls and base would be made out of. I remembered showing her the Wedi Sanoasa bench and she said, “I want that.” I knew that the bench would be a nice addition to the shower, but I didn’t know HOW AMAZING it was going to look!
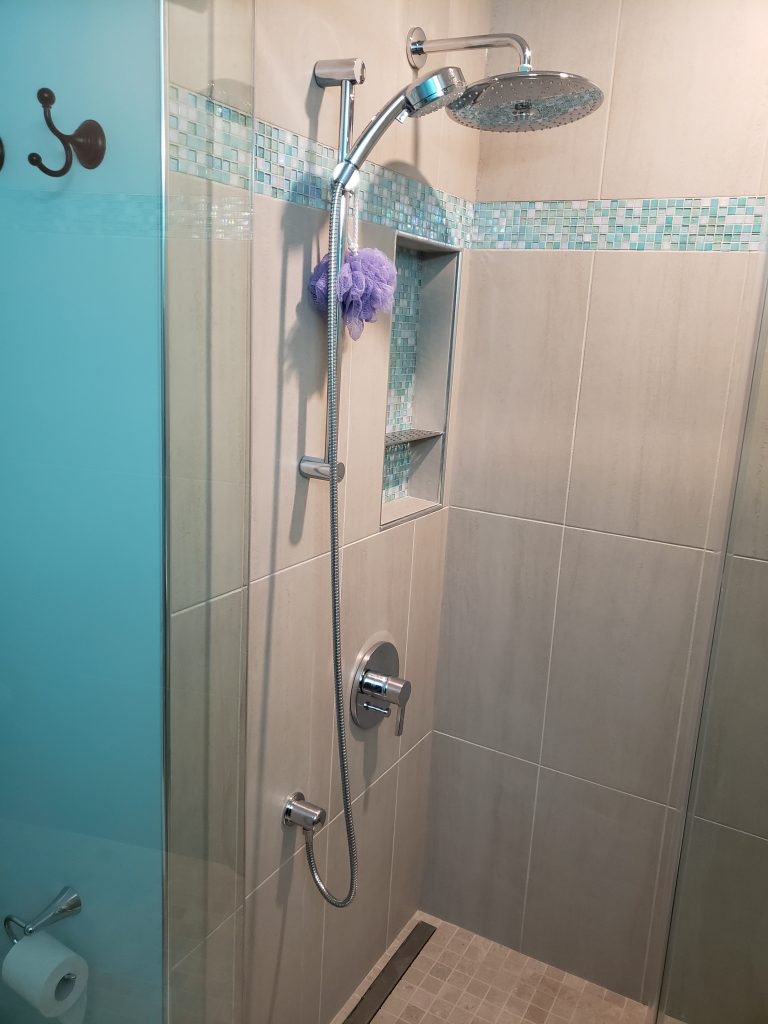
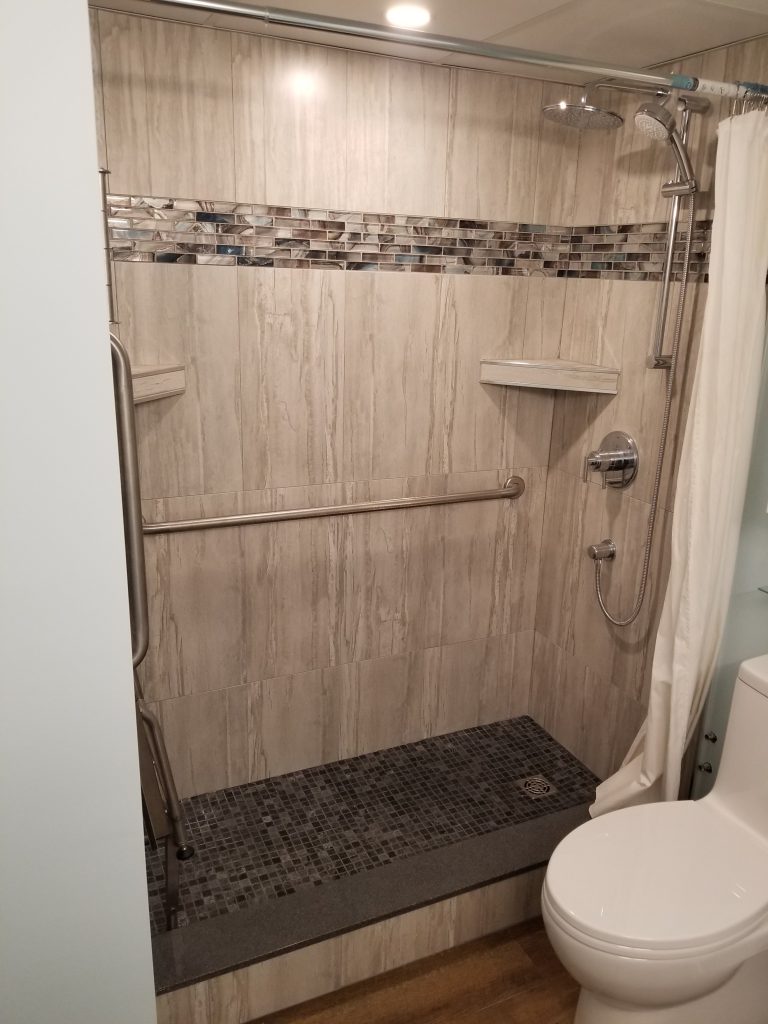
The same Aquamarine mosaic tile that was used on the backsplash was also used on the bench and back wall. We also included a horizontal accent strip along the other two walls and inside the shower niche. Originally, the client wanted a simple shower rod and shower curtain, but realizing that the amazing tile work would be hidden, she opted to include a glass shower panel and pivot door. As a side note, when I was going through my notes towards the end of this project, I sat down on the bench and it is really comfortable. I definitely know what I would like to put in my own bathroom when it comes time for a bathroom update.
-

- Custom condo bathroom walk-in shower with aquamarine tile and glass door.
-
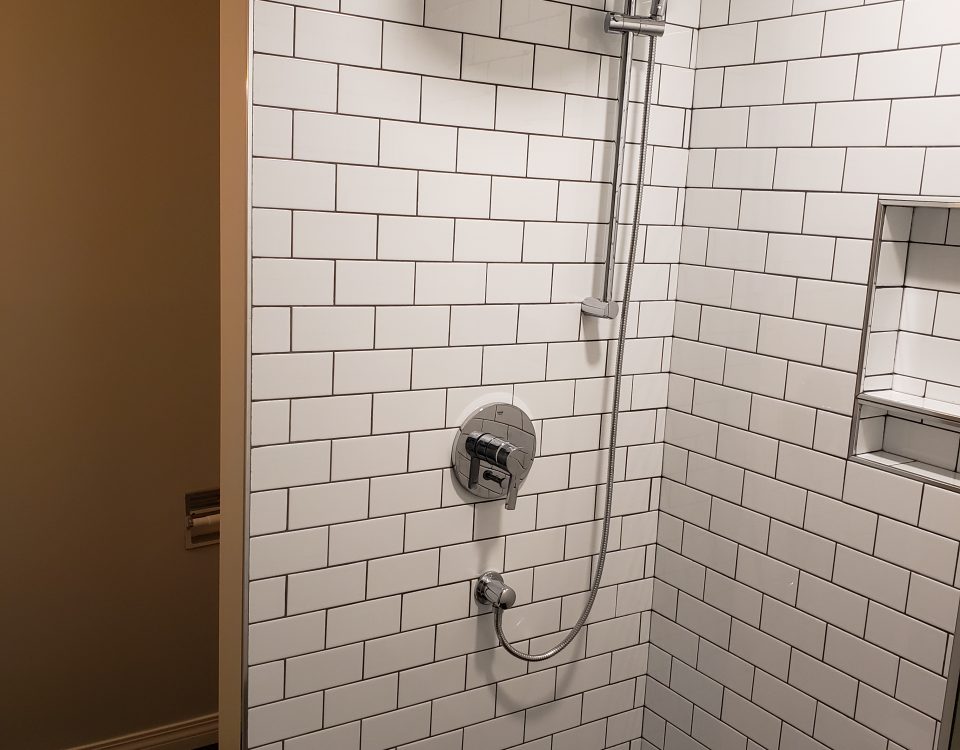
- Custom walk-in shower reno with Grohe Lineare shower kit & 10 inch rain head.
The added touches in the shower are fantastic…
While we could have gone with a simple shower valve and trim, we felt that it would have been out of place in such a nice shower. We opted to put in a Grohe Lineare shower kit instead. This kit includes a ten inch rain head and a hand shower that rests on a shower bar. A diverter is built into the valve that allows quick and easy switching from one to the other. The hand shower can also be moved up and down on the bar and lock into position. The hose is long enough to easily reach the bench in case our client wants to have a seated shower.
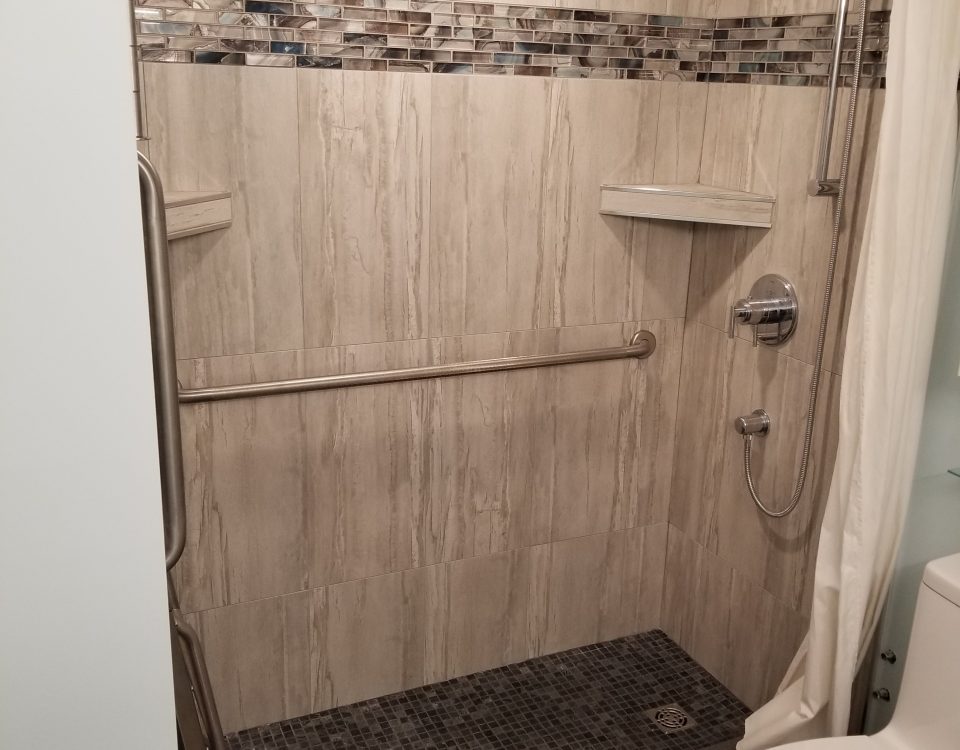
Niches in tiled showers are becoming quite common but we added a a cool stainless steel shelf in this one which looks incredible. Again luck was with us when it came to the niche’s location. We originally planned to put it on the adjacent wall, but that wall was an outside concrete wall. Our only option was to put it near the shower valve. This turned out to be a better decision anyways as the niche is near all of important stuff anyways.
Difficult to see in this photo, but exciting nonetheless, is the drain for the shower. As expected, the floor to the bathroom was concrete, meaning that a traditional drain would work unless we broke some of the concrete floor. We wanted to avoid this if at all possible because the parking garage was right below us and we didn’t want to have the possibility of any concrete falling onto any cars below. Instead of a traditional drain, we put in a stainless steel line drain. The shower pan for this drain system is a little more money that a traditional pan, but there were cost savings due to the fact we didn’t have to move any plumbing.
Check out another bathroom reno transformation project.
For more photos of this project and photos of our other projects, please visit our facebook page.